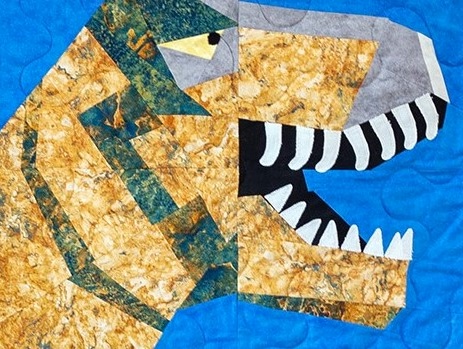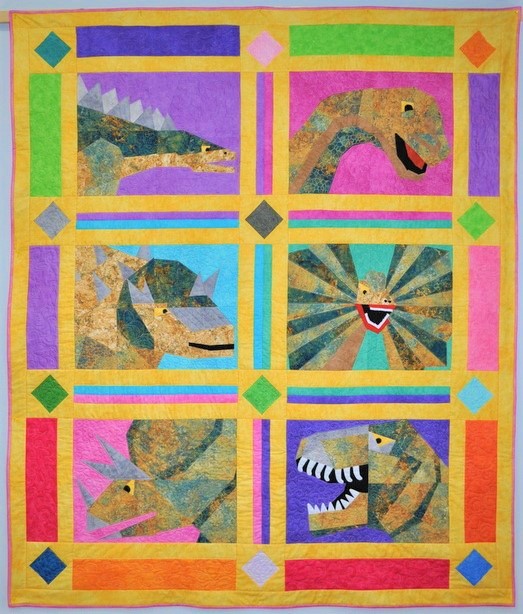
Our 1st Dinosaur Quilt Pattern: Tyrannosaurus Rex Using “Slow” Piecing Techniques (English Paper Piecing)
This handsome guy launches our series. To piece this fierce-but-kind dino using English Paper Piecing techniques (EPP), you’ll print out the 4 quadrants onto C&T Publishing’s English Paper Piecing Specialty Papers, a product created by Becky Goldsmith. CLICK HERE or the button below to purchase the individual pattern. You can also purchase all 6 as a set when you CLICK HERE. I’m really excited to learn this piecing technique along with you! The pleasure of EPP is its portability. I have several trips planned this summer and am looking forward to bringing my “slow-pieced” dino project along with me.
I’ve created several short instructional videos demonstrating the following:
- Supplies
- Cutting Apart the English Paper Piecing Pattern
- Cutting Your Fabric Pieces
- Understanding the Piece Plan
- Assembling Your Fabric Pieces
- Adding Teeth and Eye
Enjoy the adventure!
T-Rex “Slow” Piecing Video #1: Supplies
Annette provides a full list of supplies to make this handsome guy on page 2 of the pattern. This video provides an overview of my favorite tools, where to source them, and how to use them.
T-Rex “Slow” Piecing Video #2: Cutting Apart The English Paper Piecing Pattern
The key to cutting apart your dinosaur quilt pattern is using a rotary cutter and a ruler for consistently straight and even edges on your EPP pieces.
T-Rex “Slow” Piecing Video #3: Cutting Pieces From Your Fabric
There are 2 major differences between our “fast” and “slow” techniques at this stage:
1. You’ll place the template on the BACK of your fabric.
2. Your seam allowance doesn’t have to be an exact quarter-inch. I suggest cutting it wider than a quarter-inch, so that you have plenty of fabric to wrap around to the back of the template. You can use your rotary cutter and ruler, but feel free to use scissors, too.
T-Rex “Slow” Piecing Video #4: Understanding the “Piece Plan”
Let’s run through the order in which you’ll assemble your EPP pieces.
T-Rex “Slow” Piecing Video #5: Assembling Your Fabric Pieces
Once you have your fabric pieces laid out in your “piece plan”, you’re ready to hand-sew. I’ll talk about thread seletion in this video and demonstrate how to sew 2 pieces together.
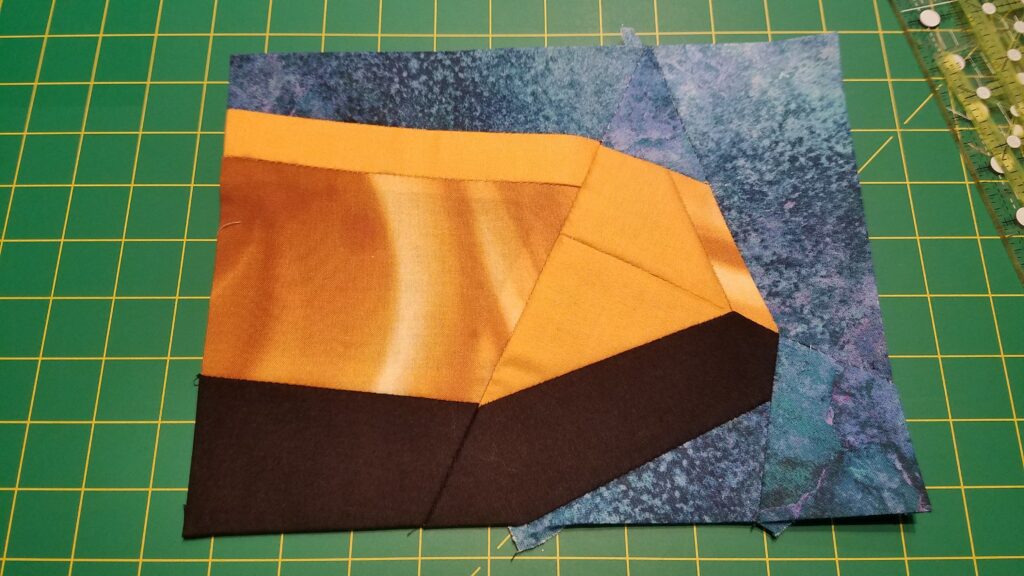
T-Rex Images of Finished “A” Block & Removing Templates
I finished my block last night! I loved every minute of it. While it’s not perfect, I’m pleased. You can see a few of the stitches on the front, but I’m fine with that. I’ll get better and better over the summer. You will, too!
To remove the paper pieces from the back, simply apply a little bit of pressure from the front to get it started popping out of the back. Save the EPP paper pieces if you want to make more T-Rex blocks!

More to come….
When I finish my hand-sewn block, I’ll show you how to use Heat & Bond to create the teeth and eye for our “slow-pieced” T-Rex. The important thing to remember is that this little guy is REVERSED. So instead of tracing the teeth patterns that you’ll find on the left edge of the page 11 in Annette’s pattern, be sure to trace the ACTUAL teeth that are already placed in Mr. T’s mouth! It’s a reverse -reverse! (I know, I know. My brain hurts!)